Wednesday, January 30, 2013

Stove Hood Filter Cleaner (say that 10 times fast)

We have moved 9 times in the last 12 years.   All but one of those moves were into rentals. I have decided that the cleaning check list is universal and I have become really good at knowing what to clean and when to clean it in the weeks before a move. 

The one that has always baffled me is the filter above the stove.  I have always just scrubbed it with Dawn soap and called it good, but I could always tell that it wasn't doing a very thorough job.

When I saw a post about cleaning your filters using an easy and effective way the clean freak in me became all giddy and I tried it that day. 

Cleaning Stove Hood Filter
Haul out your biggest pot, fill it with water and bring it to a boil.  Then add 1/2 cup of baking soda very slowly because it will fizz. Submerge your filter into the pot.

I grabbed my biggest pot, filled it with water, waited for it to boil then poured in the baking soda.  It did indeed fizz but not as much as I was expecting. I then wrestled the filter out of it's little home (you think it would have just slid out since it was covered in so much grease) and went to put it into the pot.

Hmmmm that's a problem. I didn't realize my filter was super sized.


Lets pause here so I can give you a brief description of me. I tend to have a dual personality (I am female).  When confronted with a situation in a calm way then I can act calmly and my reaction will be 'ready aim....aim....aim....aim.... fire.'  However I am not quick on my feet.  When I am confronted with a situation in an even slightly stressful way I tend to have a reaction of 'ready, fire, aim.' I don't think things all the way through and the results always create more work and hassle and sometimes money.

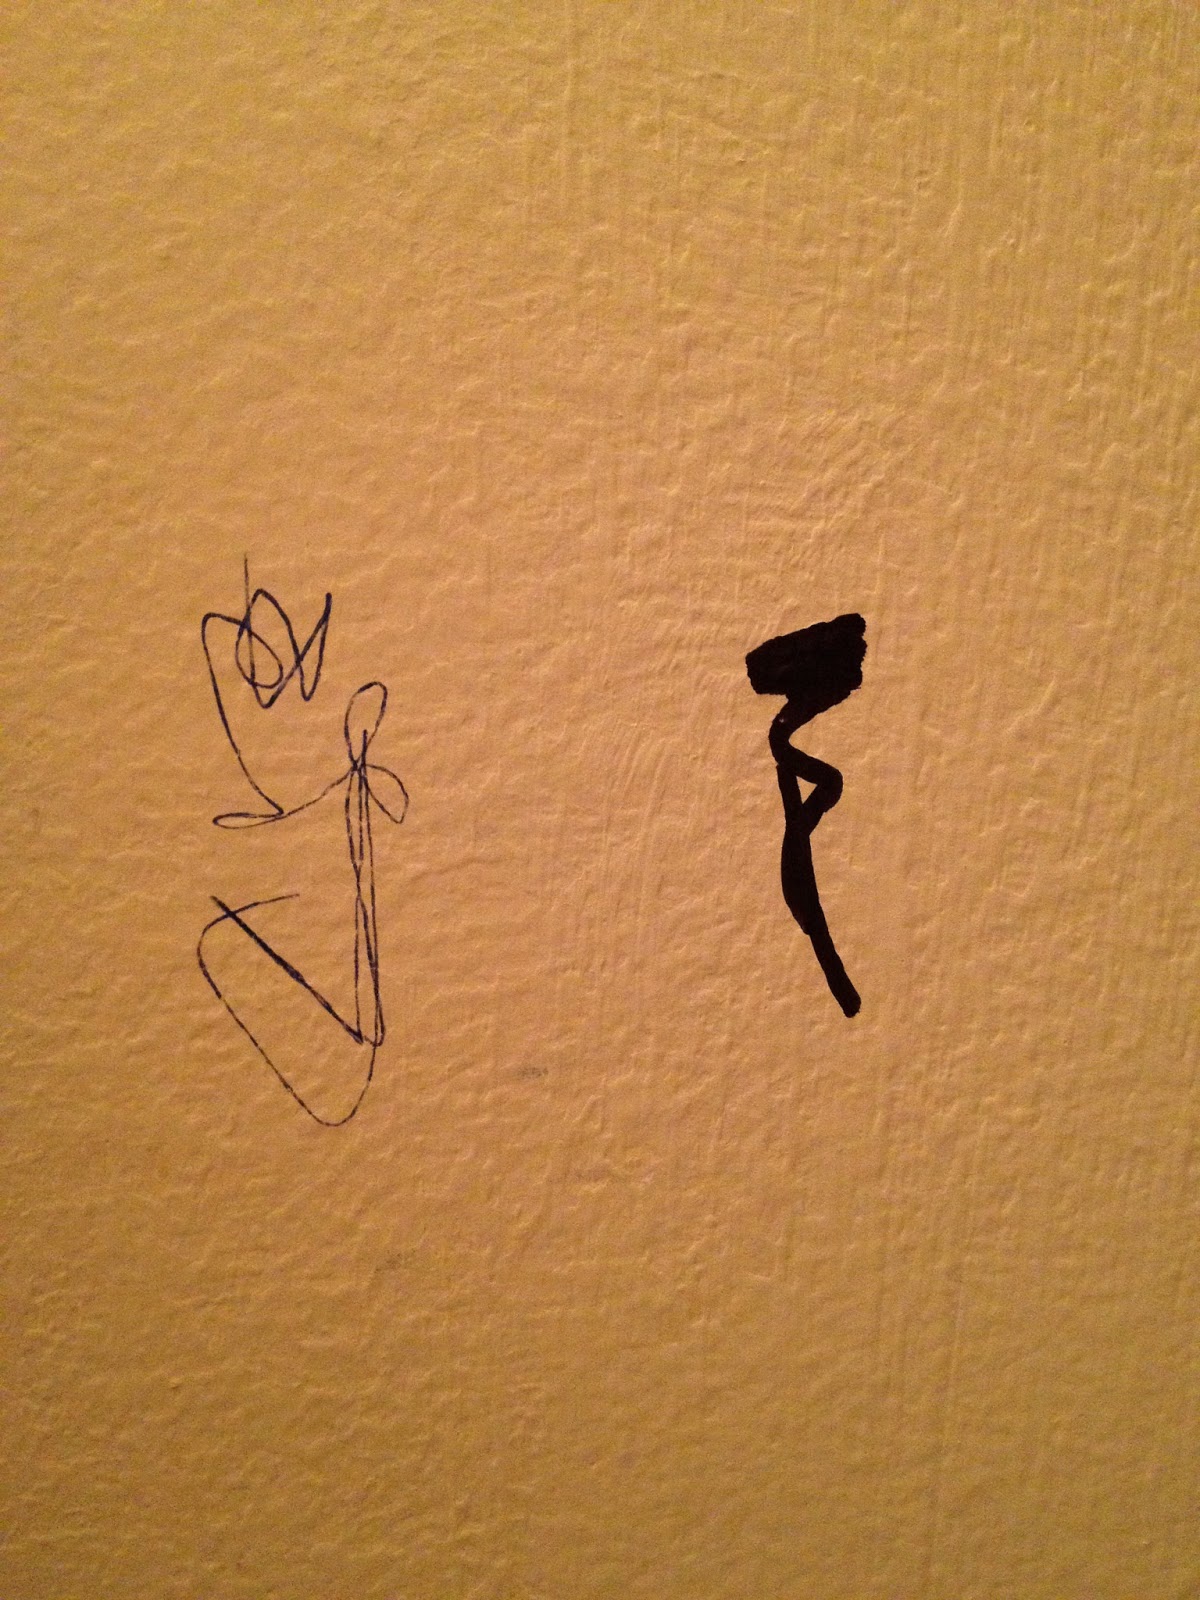
Want proof of this?  Look at this beautiful photo.  It is a long story but this is a perfect example of what happens when I don't stop to think things all the way through.  If you want the full story of this mishap then see below.*


I tell you all this so you will understand why I did what I did next.  So there I was, with a pot of boiling water with baking soda and a stove filter that would not fit.  Here was my thought process;

Oh shoot!
Ok I need something big.... something big (as I am turning circles in the kitchen looking around)
Hey the sink is big enough
(and I poured the hot water into the sink and put the filter in.)

Now lets stop here and take a poll:  How many of you see the flaw in this action?  How many of you are thinking "Whats the big deal? It will be an easier clean up"

If you chose the first question then I commend you for thinking clearly.  If you chose the second then you have my empathy.

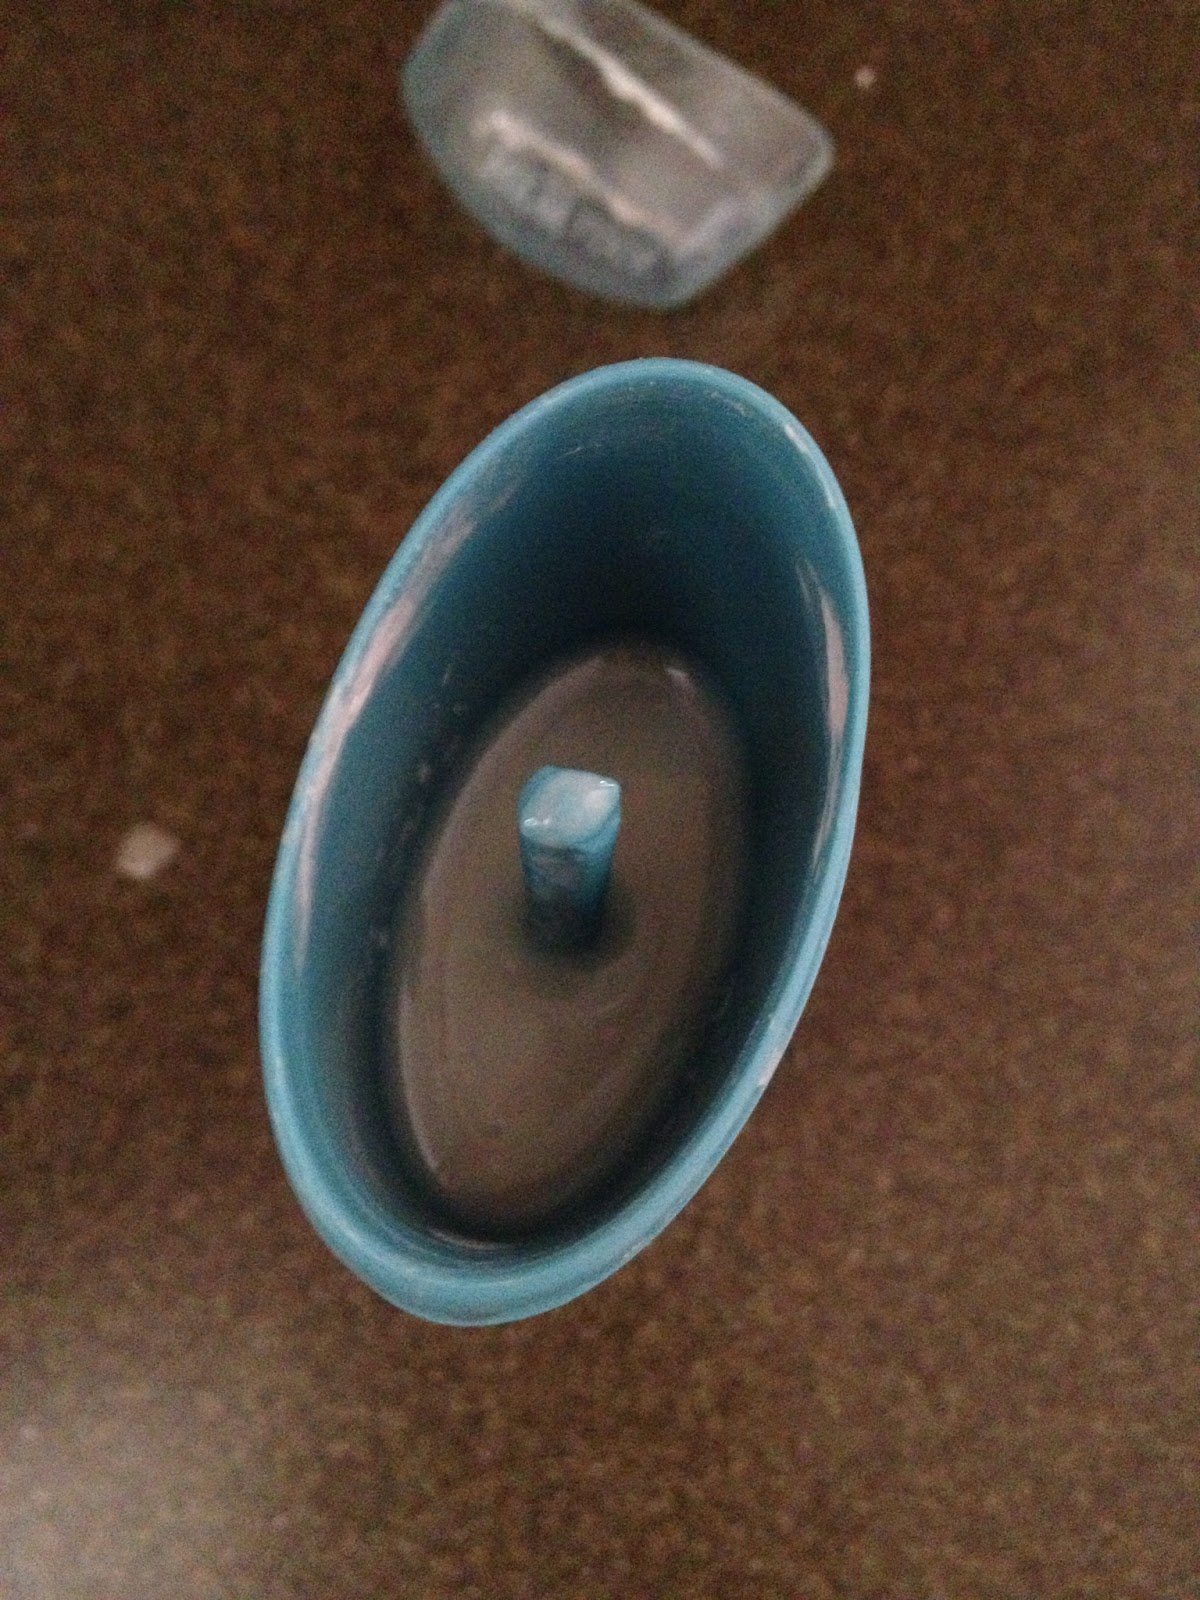
As I looked at my sink and saw the grease slowly rising from the filter it occurred to me that all that grease had to go somewhere and I really didn't want it to go down my drain.

What was my solution to this dilemma you ask?  Once the filter was clean I pulled it out of the sink and I threw a whole bucket of ice into the greasy water to try and freeze the grease into a solid.  Surprisingly, it worked.  Using a strainer I was able to get a lot of the grease chunks out.  I followed it up with a lot of DIY Drano.  It's been three months since this little adventure and my sink drain is still running just fine. (phew)

But back to the filter.  I let it soak for about 10 minutes then gave it a good rinse.

The Verdict: It worked really well and I was amazed at how much grease came out.  In the future I plan on using a casserole dish to soak the filter in. 


My mom once told me that I am a person who "gets the results I wanted, I just get there in a very creative way." This was definitely one of those moments.  


*A few years back I posted on my personal blog about how I broke that light fixture.  For your reading pleasure I have posted it below. But as a quick background, during this post I was 5 months pregnant with our first child and we had had our rescue dog for 6 months and we were still in the training process.

Have you ever had one of those days where you just want to hide under your covers? I had one of those recently. It started with my husband slamming his 4 fingers in the car door. We are both shocked that he didn't break anything but his fingers are very bruised and swollen and he probably wont' be able to use that hand for awhile. 
On my way home from work my car decided to up and die. Fortunately it wasn't a busy road so I was able to coast to the side and after several tries I got the car to start again. having your car die in traffic is never a fun activity.
My husband was working till midnight that day and I had a huge 'to do' list I was wanting to accomplish that evening. As soon as I got home everyone I know decided to take that moment to call me. Normally it would have been fun to sit and chat with all of them but my dog decided to grab everything in site and chew it so I was doing my best to run after him while carrying on a conversation.
Finally, 2 hours after getting home from work I was able to start my list. I headed outside to work in the yard a bit and brought my dog with me. Looking around the back side of the house I decided the best place to hook the end of Bud's 20 ft leash was the back porch light fixture because it's bolted to the house. Oh boy was I wrong! Bud got a smell of something and took off at a full on sprint ripping that light right out of its place. So now I have a spastic dog trying to get at whatever he smelled and a light fixture hanging from wires..... great!
 
Fuming, I locked Bud in the house and started a sad attempt to fix the light. I headed to the garage to find a wrench and my Houdini dog some how maneuvered right through my legs and ran off across the field by our house,  I swear I heard him yelling "freeeedoooooom!!!!"
I went and found his leash and a toy and started the chase. Bud got distracted by something on the ground so I took that moment to sprint through the field with my flip flops.... hello pot hole. Fortunately I only tripped a little and kept going. As I got closer I heard a squeak near Bud and wondered what he had. I yelled his name and he looked up at me with a baby rabbit in his mouth.... oh boy! 
I yelled, he dropped the rabbit, rabbit made a dash, Bud pounced on the rabbit and I pounced on Bud. I got the leash on him and with super human strength wrestled him away from the rabbit. I then decide that I needed to get the rabbit back to his den so it's mom can take care of him. So as I'm pushing Bud away with my right hand and leg I somehow manage to scoop the rabbit up in my shirt without touching it so my scent doesn't get on it (although looking back I'm sure that did nothing since it was in my shirt and my shirt has my scent on it) 
If any of my neighbors had looked out their window at this point they would have seen a crazy lady in her sweats in the middle of the field with a spastic dog trying to tackle her down and her shirt half way up exposing her pregnant belly.
I managed to get the rabbit back to it's den only to see that it's no longer moving, poor thing. I finally got back to the house and remembered that I had exposed wires outside and it was about to rain. Not knowing anything about wires I did the best that I could with rope and called it a night. It was a horrible terrible no good very bad day.


Sunday, January 27, 2013

DIY Goldfish Crackers

Awww Goldfish.  You have helped me through many rough times my friend.  You have seen me through many temper tantrums and long car rides. You have made Dr. offices bearable and lunches more enjoyable. And even though you have spent many weeks lost in a car seats crevices, only to be found and consumed by little sticky fingers, you are still the snack that smiles back

Mother Nature has finally got her act together and brought winter to us.  It has been freezing outside and the kids are starting to get tired of their Christmas presents.  About two weeks ago we needed an activity so I decided to try homemade Goldfish with them

Homemade Goldfish Crackers
Ingredients:
  • 8 ounces, Sharp Cheddar Cheese, Shredded
  • 4 Tablespoons Butter, Cut Into Cubes
  • 1 cup Flour
  • ¾ teaspoons Salt
  • 2 Tablespoons Cold Water
 Directions:

Pulse everything (except water) together in the food processor until the dough resembles coarse sand.
Pulse in water, 1 tablespoon at a time.
Remove dough from the processor, wrap in plastic, and chill for 20 minutes.
Roll out the dough and cut into desired shapes. You can use a toothpick to make the eyes and smile if desired. Place on a parchment paper lined cookie sheet.
Bake at 350 degrees F for about 15 minutes, or until crispy. 


 My food processor is one of those cheap-o kind that come with a blender, so I wasn't sure how these would turn out, but it's always worth a try.

I threw the ingredients in the processor and turned it on. It only took a minute or so until everything was blended together and looked like sand. 

I poured the water in and in no time at all I had really thick grainy chunks. It reminded me of cheese curds.  I smashed it all together into a dough ball, put it in a Ziploc bag and stuck it in the fridge, only to be reminded that the fridge STILL needs to be cleaned out....... I'll do it tomorrow. 
 At this point the original poster pulled out homemade cookie cutters.  She cut up an aluminum can to make fish and pac-man shapes.  I had no desire to put so much effort into something that was going to be eaten in about 40 minutes so I just used regular cookie cutters.  Once the dough had chilled for 20 min I rolled out the dough (it was a bit crumbly and grainy, but it held together good enough) and handed the kids diamonds and stars. 

I had halved the recipe and we ended up with about 25 quarter sized crackers.

When I pulled them out of the oven I was surprised at how much the crackers had risen.  They almost doubled in size but it was all in height.

The Verdict: They didn't taste exactly like Goldfish but they were pretty close.  I like them better because they weren't as salty and they had a nice soft texture.

 The kids loved them and ate all of them that day.  I might of had a couple a few, ok fine, I ate about half of them.

I told a friend that we had made them and she mentioned that this isn't something she would ever do.  Why spend all that time making something when you can just buy it at the store? 

This of course got me thinking about how much time it took and if I was saving any money.

So I made another batch by myself using the full recipe, and this time I used my friends suggestion to use a pizza cutter to make little squares in the dough.

The total hands on time was 10 min.

The homemade crackers cost $4 for 13 oz.
The store brand cost $7 for 30 oz.

Ok, so this DIY isn't going to save you time or money, but the kids had a great time cutting the shapes and they tasted great.


Wednesday, January 23, 2013

Bath Crayons

What is it about kids and water?  It's like they have some 6th sense and know where all the puddles are and can't resist to splash and jump in them.

Because of this draw to water, the bathtub has become my go to spot for the kids.  When I am in need of a break I throw them in the tub and sit on the floor with a book  They will spend at least 30 minutes playing with the few toys they have in there.  If I throw in some bubbles then and I can add on another 15 minutes.

A few months ago this magical go to spot was losing it's magic and they were getting tired of the toys in the tub.  I saw a pin for making your bath crayons and thought that this would be a great way to get them excited again.

Homemade Bath Crayons
Buy some glycerin soap at a craft store. Melt it in the microwave, add food coloring, and pour into a mold. I used an ice cube tray. You can also add essential oils if you go for scents, though I find that a bit unnecessary for bath crayons. Takes about an hour to cool completely, then pop out of the mold and you have crayons!

I grabbed some glycerin (you can buy it at almost any craft store) and melted it in a pot on the stove.  It's easier for me to melt things on the stove then in the microwave.  I feel like I have more control, plus things don't explode. For some reason the picture on the bag makes me giggle.  The lady in the tub is so glamorous, and she is posing with a rubber ducky.

I poured the melted glycerin in an ice cube tray and added about 3 drops of food coloring.  

Using a toothpick, I mixed the food coloring into the ice cube tray and left it to cool.  It hardened up within an hour.  

The Verdict: Nothing.  Didn't even leave a hint of a color.  My son tried it on the tile, the grout and in the tub and it just left white soapy trails. 
 I got online and found a few comments on other websites about people having the same problem I had.   One person said they melt regular soap and add food coloring to that to make bath crayons.

So I grabbed a bar of Dove and melted it on the stove. This time I used half the amount of soap and double the amount of food coloring. I mixed it all together and left it to harden.

The Verdict: Still nothing.  If you look in the grout in the photo you can see little blue flakes.  That was all I could get after rubbing the soap really hard onto the grout. 

 Even though the crayons didn't work, my kids still had fun playing with the "colorful cubes" in the bathtub that night, so it wasn't a total waste. Plus they were very clean after playing with all that soap.


Sunday, January 20, 2013

Getting Permanent Marker Off Your Wall

Ever since I learned about using Mayonnaise to get crayon off the wall I have been obsessed with it.  I am embarrassed to say that I have spent way to much time thinking about it and wondering if the Mayonnaise would get other things off the walls or if it was just for crayons.

I finally got enough courage to draw on my wall with pen and permanent marker so I could test it out.

I choose a very discrete place in my pantry that wouldn't show if the Mayonnaise failed to remove the ink, and made two pretty little scribbles.


I rubbed Mayonnaise all over the two marks and let it sit for several minutes.  I then came back to scrub the the spots and......

Oh poop!  Didn't even smudge it.

Welp, looks like I have some researching to do.  Several websites I found said that regular hand sanitizer will get any ink off the wall.  I grabbed what was in my diaper bag, squirted a bit on a rag and scrubbed at the ink.
The Verdict: Hooray! Both the pen and the permanent marker came right off with very little effort.  A little bit of the paint came off with it but not much. 


I now have a way to clean crayons, pen ink and permanent marker from my walls.  Lets hope my little gal doesn't find the acrylic paint.


Wednesday, January 16, 2013

DIY Deodorant.....Yes, Deodorant

I have seen some websites about making your own deodorant, but this was something I never planned on trying.

Walking around with greasy arms and legs from homemade lotion is one thing, but walking around in my own pig pen type funk is something else entirely. 

But then a friend of mine tagged me in a Pin about making your own deodorant and told me I should try it.  I wasn't to excited about it but.....


The pin that my friend tagged me in was one of those that gives you all the details in the pin so there is no need to click on it.  However, I did click on it to see if there were any other details that weren't in the pin description and hello...... it took me to a site that had nothing to do with deodorant.  It was a site about going 'poo free.  As in not using shampoo to wash your hair.

Of course this intrigued me and read the blog learning a lot about keeping your hair clean without shampoo, but that is for a future post.

Since I have no idea where the details about making your own deodorant came from I can't give credit where credit is due, so I will just put on the details from the pin.

Homemade Deodorant
Best deodorant ever!!!! 1/4 c. baking soda, 1/4 c. cornstarch, and 6 T. coconut oil (which you may have to melt first). Mix well, add more coconut oil if you need a more creamy consistency and I put it in a glass bowl on my bathroom counter. It’s unbelievable. You can wear your shirt for days if need be. 

Every homemade deodorant recipe I have read has tea tree oil in it, since I am a huge fan of tea tree oil I decided to throw in a few drops. 


I melted the oil in the microwave then mixed everything together.  The baking soda and cornstarch dissolved very easily.  I then poured it into an old deodorant container and let it cool.

I used it for three weeks and for some crazy reason the entire world decided to ask me what my latest DIY project was during those weeks.  When I told them I was testing a homemade deodorant the typical reaction was this.
I can't blame them. I pretty much had the same reaction when I first read about it. (that is my younger sister, in case you wondered)

The Verdict:
(Disclaimer: I don't sweat much.  Pretty much not at all, I'm the person you see at the gym that is all red faced but completely dry. So keep that in mind while you read my verdict and decide if you want to try it for yourself)
It worked a lot better then I thought it would.  The first week I had a couple of "HOLY SMOKES!!! I STINK!!" moments. But I think I wasn't using enough.  Once I put more on in the mornings it worked great.

One morning I realized that I had completely forgotten about a social event that I had to be at and was suppose to leave the house in 5 minutes.  During my mad dash of clothes, make up, and shoving food at the kids I never reapplied the deodorant.  Of course I remembered this half way there and did a quick pit check.  All was well.  What I had applied the day before kept the body stank at bay for almost 36 hours.

However, I am not fully convinced that this is a great deodorant.  I want to try it in the summer to see how it holds up in the heat.  However, I did put it up against a very intense miracle workout and it seemed to work the same as my store bought deodorant.

The consistency took a few days to get use to.  It would sort of melt onto my skin, but dried fairly quickly.  It also seemed lighter, like some how my armpits didn't have goop slathered all over them. 


Unfortunately, It didnt' last long in the old deodorant container.  It worked for about 5 days and then for some reason I couldn't pull it up anymore.  I got out the rest of the deodorant out of the container and put it in a bowl.  I tried to apply it with my fingers but that was a huge hassle and very messy.  I ended up just putting toilet paper around the bar and applying it that way.  When I make it again in the summer I plan on finding an easier way to apply it.


And there you go, never judge a book by it's cover.  Who knew that I would actually enjoy a homemade version of deodorant and that it would work.  At least I think it does, no one has told me that I smell.  Maybe everyone is just being polite. 

UPDATE: 7/12/13 - I ended up using this deodorant for 3 months.  I love it.  It's very easy to make, I like the way it feels and it works great.  The biggest problem with it though is that it melts easily.  My bathroom tends to get fairly warm in the summer so once the temperatures started to rise in May I wasn't able to use it anymore because it was always halfway melted and the ingredients would separate.  Maybe I need a mini fridge in my bathroom.


Sunday, January 13, 2013

DIY Drano

We are what's known as Corporate Gypsies. In some major corporations there is limited career growth if you stay in one place.  In order to progress in your career you have to bounce from one business site to another while staying with the same company.  This is why we move every 2-3 years.

In our (almost) 12 years of marriage we have lived in 6 states.  There have been good things with each one but North Carolina will always be one of my favorites.

While we lived there I became close friends with a women who is about 25 years older then me.  She is very much a southern women and she taught me many wonderful southern things such as what yonder means and how far a tator chuck is.

She had some fantastic cleaning tips, but the one that has been the most useful is homemade drano.

Homemade Drano
You will need
Baking soda
vinegar
boiling water.

Pour some baking soda in your sink. Pour in some vinegar until it stops bubbling.  Let it sit awhile.  Pour the boiling water down the drain.

The southern folk don't measure things.  They have this gift of knowing exactly how much of something they need, so I can't tell you how much baking soda and vinegar you need, but here is what I do.

I grab a box of baking soda and just pour it in.  It usually comes out to around 1/2 to 1 cup. 

 Then I slowly pour in the vinegar a little bit at a time until it stops bubbling. 

I boil about 3 cups of water then pour it down the drain. 

The Verdict: This doesn't work great for really clogged sinks.  It's more of a preventative item, but I have had success on drains that are slow and getting close to clogging.  My friend told me she does this to all her sinks and tubs/showers once a month and she has never had a clogged drain. 

So if you have drains that are off like a heard of turtles then this drano will help the water get through faster then green grass through a goose.

Ya'll come back now, ya hear?


Wednesday, January 9, 2013

DIY Tupperware

When I had my first child some women in the area brought us dinner. It was of course greatly appreciated. One women brought her dinner in old plastic cool whip and cottage cheese containers.  She told me that she always has these on hand so that she can take food to people and not worry about getting her good Tupperware back. 

When I heard this I had one of those "D'OH" moments.  The kind of moment where something is so obvious that you can't believe you never thought of it before.

So my Tupperware cupboard is now full of old plastic containers and I have used them for many things but mostly for organizing the kids stuff like crayons or cars.

They work great, but the down side is I never know whats in them since my photographic memory is still in the shop (it broke during my first pregnancy.)  I saw a post about getting the ink off of the containers and was very excited about it.

Remove Ink From Plastic Containers
You will need
Acetone (found in the beauty section next to the nail polish remover)
Dishpan
Rag
Gloves

Directions
 Wear the gloves to protect your hands and saturate the rag with the acetone.  Make sure you are in a well ventilated area.  Wrap the rag around the container and let it sit in a dishpan for 3-5 minutes.  Check the container by rubbing the paint.  If it doesn't come easily off then keep soaking.

I had never heard of acetone but it was easy to find. It was right by the nail polish remover and it was around $3 or $4. I can't remember exactly.


I soaked my rags.... then passed out from the fumes.  Ok I really didn't, but I never knew there could be a smell that is worse then ammonia.  I put the rags over the containers then went outside to get some air, the whole time I was wondering if I had any brain cells left.


After about 5 minutes I went back to rub a little of the ink to see if it would come off.  I then had to run and shove my hand in ice water to warm it up.  Yes you read that right.  I have no idea what acetone is or what  is in it, but something that smells that bad and burns my gloved hand from being so cold should be banned.  It was like grabbing dry ice.  (yes I am exaggerating again, but the rag was freakishly cold and I had to keep taking breaks so my hands could warm up.)

The Verdict: After rubbing at the ink with the wet rags I was both surprised and disappointed.  The website said that some containers will work better then others.  I ended up doing about 6 of them to see how each one would work. 

This Greek yogurt worked great.  It took very little effort for the ink to come off the container and it's lid

You would think that this is a before photo, but it's not.  The acetone didn't even smudge the ink.


I had a couple of containers that looked like this.  I bet if I soaked them longer in acetone then I could have gotten all the ink off, but this would have required longer time with the fumes and freezing rags. 


It works, and I like that I can use dry erase markers on them so I know whats it in, but I won't do it again.  Save yourself the  headache (literally) and spend the money on cheap Ziploc Tupperware. 


Sunday, January 6, 2013

Detox Bath

My little sister once said "the only thing worse about having sick kids, is being sick and still being needed by kids."

It's hard to have a sick child, to see them miserable and know that you can't take it away from them.  It's hard to watch a toddler vomit and then look at you, pleading with you to take away the pain because that's what mommy does, she kisses it better and takes away the pain. 

Sometimes it's even harder to be the one that is sick and to still crawl out of bed to make breakfast, clean the kitchen, find shoes, fight traffic on the way to school, convince a child that they really do need a nap, make lunch, play  dolls, play house, play play-doh, make dinner, step on Lego's, mop up the floor after bath time and do it all with a smile and without losing your temper. 

I saw a Pin about a detox bath and in the instructions it said, "This is especially beneficial if you are trying to rid the body of a bug of some sort, like the flu, or a cold."

Worth a shot.

How To Take A Detox Bath
Fill your tub with comfortable hot water
add epsom salt
  • For children under 60 lbs, add 1/2 cup to a standard bath.
  • For children 60 lbs to 100 lbs, add 1 cup to a standard bath.
  • For people 100 lbs and up, add 2 cups or more to a standard bath.
add 1-2 cups of baking soda
add 1TBS to 1/3 cup of ground ginger

Soak in the tub for 40 minutes.  The first 20 minutes are said to help your body remove the toxins, while the second 20 minutes are for absorbing the minerals in the water

The ginger can make you sweat profusely so be sure to drink plenty of water during and after the bath. 

The website has a lot of great information on what each of the ingredients do and some tips to help make the bath more beneficial.

So I waited until I felt something come on.  I didn't have to wait to long, tis the season for bugs. The kids got some sort of strange bug that left them tired and with a low fever for a few days.  About 4 days into it I started feeling warm and tired.  After I put the kids in bed I got my ingredients and filled up the tub. 

The ginger made the water look pretty nasty and I was surprised at how much the scent of ginger filled the bathroom.  The epsom salt and baking soda dissolved immediately.


The website talked a lot about how ginger can make you sweat, so I started out with 1 Tbsp.  Ten minutes later I was actually getting cold and not sweating at all, so I added two more tablespoons.  I still didn't sweat but I sure did tingle.  My skin was really tingly for the rest of the bath.

Sitting in the tub for 40 minutes sounded like a long time, but I grabbed my ipad and a book and really enjoyed myself, despite the tingling. As I was soaking I kept thinking about how the website said that the first 20 minutes are for the toxins to be pulled from your body and the next 20 minutes are for your body to absorb the minerals in the water. Soooooo, the toxins come out..... where do they go?  Isn't your body going to soak them right back up? 

 The website also says that it's best to take the detox bath at night so you can immediately get into your bed and rest. During the 40 minutes in the tub I felt great, but as soon as I stood up I was surprised at how drained I felt.  I felt weak and tired and was more then happy to follow the websites instructions by getting into bed.  I was asleep in minutes and it was only 9pm

The Verdict: I woke up the next morning feeling fantastic.  I was energetic and happy and even had a Snow White moment when I was singing silly songs while making breakfast.  I never got the illness my kids had.

Of course there is no way to prove that the detox bath is responsible for keeping the illness at bay.  However, I have taken 3 more when I felt as though something was coming on and I always woke up the next morning feeling fantastic.

The last time I took one I purposely waited to see if something was really coming.  Sure enough i got a minor stomach bug.  Half way through my first day of worshiping the porcelain thrown I took a detox bath then took a nap.  I didn't feel any better and I was sick for another 24 hours.

So it's hard to say whether it works or not, but I do know that I enjoy them and I will probably be stocking up on more ground ginger

Wednesday, January 2, 2013

Window Blind Cleaner

Do you have a window in your kitchen?  Does that window have blinds?  On a scale of 1-5, how dirty are they?  Off the charts?  Yes I thought so.  Blinds are one of those things that tend to get really gross because you either a) don't think about cleaning them or b) know you should clean them but it's such a hassle you prefer to ignore the problem.

Recently I keep seeing Pinterest posts about cleaning blinds.  Most of the cleaning methods I have seen involve putting a sock over your hand.  While that is a great method for some blinds, it doesn't work well for the common metal blinds that are in most homes.

Let me share with you a trick that my mom taught me.

Window Blind Cleaner
1/2 cup Vinegar
1/2 cup baking soda
bathtub full of hot water

Take a look at the top of the blinds. Do you see that little box on the top right and left corner?  The front of the box opens and you can take the blinds out.  Amazing!!!

Now some blinds don't come out, if that is the case with yours then sit tight and we will address that later. 


 Fill a bathtub with enough water to cover the blinds.  Pour in the baking soda and vinegar and mix it all up.  Put the blinds in the bathtub then go enjoy an episode of Downton Abby
I usually leave it in the tub for at least an hour and some times up to 8.  It just depends on when I get to it again. Drain the tub then rinse the blinds with the shower head.  It's easiest with a detachable shower head but it will still work without one.  Basically you are blasting the blinds with water to take off all the gunk that was just softened during it's spa treatment. 

Let it air dry in the tub or on a towel before you hang it back up. 

The Verdict: This works so well and is so easy to do. The hardest part is cleaning the tub after your done. Here are some before and after photos of blinds I recently did.  You can see the the big blob of something, along with little blobs of who knows what else.


 Nothing is left but water. 

All the blob spots and a little fly ended up in the tub. 

Now for all you folks who have metal blinds that won't come down easily.  Fill a spray bottle with mostly water then some vinegar and baking soda.  It really doesn't matter what ratio you use.  Put a towel under the blinds then spray away.  Spray until the blinds are completely soaked.  Let it sit for awhile then wipe it clean.  You will probably have to do more scrubbing with this scenario, but it still works.

And there you go, you no longer have an excuse for not cleaning your blinds.