Sunday, April 28, 2013

Homemade Almond Coconut Candy Bars

When it comes to chocolate I am pretty much a stereotypical female. I am a ''put down the chocolate and no one will get hurt'' kind of gal.

My favorite candy bar of all time is Almond Joy.  It's not so much the coconuty and almond goodness, but the nostalgia I have for it.  The only time I ever had Almond Joys growing up was when my dad went hunting.  He would buy them on his trips and when he came back there was always left overs in his cooler.

This brings us to our post for the day

Almond Coconut Candy Bars
yield: 30-40 candy bars, depending on how you cut them 
7 ounces sweetened condensed milk (half a standard 14-oz can)
1 tsp vanilla extract
1/4 tsp salt
2 cups powdered sugar
14 ounces (about 2-1/2 cups) shredded coconut
3/4 cup whole roasted almonds
1 lb chopped dark chocolate, or chocolate candy coating

Directions: Line a 9x13-inch pan with aluminum foil and spraying the foil with nonstick cooking spray. In a large bowl, combine the sweetened condensed milk, the vanilla, and the salt. Stir them together until they're well-mixed. If your room is fairly cold and the condensed milk is thick and hard to stir, microwave it for 10-15 seconds, just so that it loosens up and is easier to work with. Next add the powdered sugar to the bowl with condensed milk, and stir it in.  It may be difficult to incorporate it all at first, but keep stirring and you should soon have a thick, smooth mixture like this.  Now for the star ingredient: the coconut. Add it all at once and mix it with the condensed milk until there are no dry patches remaining. This can be done with a mixer, but I like using a wooden spoon. Your final coconut mixture should be sticky but fairly stiff. If it's runny add a bit more coconut, and if it's very dry, add a bit more condensed milk. Coconut can have different moisture levels depending on its age and how it was stored, so there's some trial and error involved in getting a texture you love.  Scrape the coconut into the prepared pan. Wet your palms and press the coconut into a thin, even layer. You can control how thick you want the coconut layer to be. I prefer my coconut to be about 1/2-inch thick, so I don't cover the entire pan--I use about 3/4 of it and leave the rest of the pan empty.  Use a knife or a pizza wheel to lightly mark the top of the coconut into bars. This is optional, but it keeps your candy bars the same size and helps immensely in almond placement. Take your almonds and press them into the sticky coconut. I use 2 per bar, to stay traditional, but you can use more or less, to taste. Once all the almonds are placed, refrigerate your pan to firm up the coconut, for about an hour. Once the coconut is firm enough to cut, take it out of the refrigerator. Lift the candy from the pan using the foil as handles. Use a large sharp knife to cut your bars along the lines you marked earlier. Place your chopped chocolate or candy coating in a microwave-safe bowl and microwave it in 30-second increments. Stir it after every 30 seconds so that it doesn't overheat. When it's melted and smooth, use forks or dipping tools to dunk each candy bar in the chocolate, then tap it against the lip of the bowl to remove any excess chocolate. Place the bars on a foil-lined baking sheet to set while you dip the rest. Refrigerate the tray to set the chocolate for about 10 minutes.

Did you catch all that?  If your feeling overwhelmed by the directions then I recommend you go to the link.  The directions are broken down with pictures for an easier to read, step by step process.

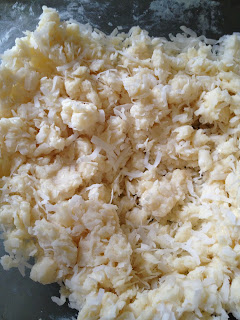
I mixed the first four ingredients until it was pretty thick and hard to stir.  I then added the coconut until I had a consistency that was wet and sticky, but not to dry.  When I squished it together it stayed together.


I pressed it all into my pan until I had a nice rectanglee. Then using a pizza cutter I made the lines on top of the coconut mix so I could have a reference for my almonds.  I decided to make smaller bite size bars so I just did one almond for each bar.


After it sat in the fridge lone enough, I took them out and cut all the way through the bars.  It was pretty easy to do so, but some of them seemed a bit flaky and dry. 


Then it was time to dip them in the melted chocolate.  I chose to do milk chocolate instead of dark chocolate. I'm not a big fan of dark chocolate, and Almond Joys are made of milk chocolate.   As I started to dip them I quickly got frustrated because they were falling apart big time. The Almonds were sliding all over the place and bits of coconut kept falling into my chocolate. 

Eventually there were so many coconut flakes in the chocolate that my bars went from looking like this.....


To this. Even though they looked horrible, I still had hopes that they would taste great. 


The Verdict: I never realized how much Almond Joys don't taste like coconut.  I bought an Almond Joy so I could compare the two and I was really surprised at how much they differed in coconut taste.  The homemade version has a sort of fresh taste to it.  Like the coconut was fresh.

The homemade one is EXTREMELY sweet.  Clearly I should have stuck with the dark chocolate like the original poster had in the recipe.  


Wednesday, April 24, 2013

Orange Peel Vinegar Cleaner

 It's funny how great minds think alike.  In the course of a week I had quite a few people ask me if I had ever done the Orange Peel Vinegar cleaner. One person had 2 great questions regarding it 1)does it attract fruit flies? 2) do things get sticky from the orange peels?

I had never tried it before, so of course I had to fix that and test the stuff.  I found many, many, many different websites about it but they all pretty much said the same thing.

Orange Peel Vinegar Cleaner
You will need:
Orange peel (or any citrus peels)
Glass jar with a lid
Vinegar

Directions:
Place all the peels into your jar until the jar is full.  Pour in enough vinegar to cover the peels.  Seal the jar and let it sit for at least 2 weeks.  Pour the liquid into a spray bottle and use as an all-purpose cleaner.  (Some people choose to use it as a concentrate and add 2 parts of water to 1 part of vinegar)

I loaded up on oranges and thoroughly enjoyed them while saving all the peels. It took about 2.5 oranges to get enough peels to fill a regular mason jar.

I poured in the vinegar, sealed it, and put it in my pantry.


The Verdict: 2 weeks later I opened the jar, shoved my nose in and breathed deep (and prayed i wasn't about to singe all my nose hairs from a vinegar overload) It smelt great.  There was a hint of vinegar, but it mostly smelled like orange juice.  Unfortunately the smell didn't last.  The orange scent faded over the next week or so and it eventually smelled like the vinegar was rotting. The smell is pretty strong and likes to linger.

I never noticed any fruit flies being attracted to it, but it's also been pretty cold and the fruit flies are few and far between.

It is a bit sticky when wet, but fortunately the sticky fades as it dries. 

All that being said, it's a great cleaner.  Picture this: a little girl sitting at the table downing a blueberry and spinach breakfast shake.  For no apparent reason she decides to throw the rest onto the ground. For many reasons, I didn't get to that spill for 3 days.  It just sat there, happily baking in the sun.  I knew it was going to be a beast to clean when I finally got to it, so I sprayed the citrus vinegar onto it, let it sit a few minutes then went over it with a wet wag.  It came right up, no scrubbing.  Booyah!!!

I was pretty sad that the orange smell didn't stay, so I decided to try lemon peels to see how the smell differed.

When the two weeks was up I opened the jar, shoved my nose in and breathed deep.... HELLO! My sinuses were very clear at that point. There was no lemon smell at all. But the way it cleans and the sticky texture is exactly the same as the orange peels.


So even though it stinks and is a bit sticky, it cleans great and I plan on saving all my citrus peels to make more.


Sunday, April 21, 2013

Woodworking

If you haven't figured it out by now, I love DIY stuff, and I'm not picky about what I try.  If it can be homemade, I'll try it at least once. 

Two years ago a friend of mine introduced me to http://ana-white.com/ (it's the same website as knock-off wood if you have heard of that one) and I have fallen in love with building my own things.  I'm not very good at it, but I love it.  Some people have suggested that I add some of my items to this blog but I don't think it would be very practical to give a verdict to a blueprint that I messed up.

But what I will do is give praises to this website and tell you why I love it. If you have ever been interested in woodwork then this website is a fantastic place to start.  You can find  countless plans for building anything from a simple picture frame to a bunk bed.  You can search plans by categories, room, skill level, price etc.  And if you have zero knowledge of tools and working with wood, there are a lot of great tutorial videos and forums that will answer any questions you have.

"But wait, I don't have any tools" you might say.  Well guess what my friend, all you really need is a power drill.  Lowe's and Home Depot will cut the wood for you and if you bat your eyes at the workers, they will even pick out the wood for you and haul it around the store.  Ok, they will do that without the flirting,  all you have to say is "help please" and usually they are ready to jump in.  One time a worker spent 20 minutes telling me all he knew about drill bits.

Having a sander is nice because it cuts down a lot of work and time, but you can sand everything by hand.  I have used a jigsaw on many occasions but most of the time it wasn't necessary, usually it was because I messed something up and had to adjust things. 

Before you start any building project I suggest that you read everything about that project.  Even the comments.  Even though it takes time, and sometimes there are more then 100 comments I have always found something helpful by reading them. 

Let me show you the projects I have done so you can see the great variety the website has.  Again, they aren't great, but when I started all I knew was how to use a power drill.

This library cart was my very first build.   The wheels have since broken off (Trying to wheel it with 50lbs of books on it wasn't a  good idea) but it has held up great.  It holds a lot of books and it's right at the kids level

This end table/mini TV stand was a little bit more challenging because of the drawer.  You can see that it's a bit crooked.  This project also taught me how unforgiving stain is.  It highlights any scratches you have and I don't care what the bottle says, there is no such thing as stainable wood filler. 

Dog food bowl.


The kids have a cute little table I bought on craigsilst a few years ago.  One of the chairs broke, so I made another one using scrap wood I had. 

My sons platform bed.  


 A play kitchen for the kids

My daughters bed, and the source of my concussion.  That 5 foot, 50lbs headboard was leaning against the wall and I was crouched below it messing with the railings.  I'm not sure what happened, but that thing came down and got me in the back of the head.  I don't think i was fully knocked out but I have no memory of crawling out from under it and laying down next to it.  Apparently when working with wood I should start wearing a helmet.  It will look good with my oh so attractive safety glasses.


Sunday, April 14, 2013

The Bad Side of DIY

Short story shorter, I have a concussion brought on by DIY project. Looking at computer screen and reading causes a good amount of pain. This guinea pig needs to take a break. I'll see you all in a week or so when I can look at a computer screen again without little stars showing up in my peripheral vision.

Wednesday, April 10, 2013

Bathtub Paint

I was looking at old blog posts and I realized that I have introduced my sisters through various posts but I have neglected my brother.  

He is also a fan of DIY projects, but his aren't exactly every day practical things.  Let me explain through a video.


What does this have to do with bathtub paint?  Absolutely nothing!  I just think it's hilarious that a successful business man and father of 4 has a DIY bungee jump in the middle of his living room. Did you notice the girl sitting on the crash pad acting as though someone flying above her head is a very normal thing?  That would be my very patient sister in law.

Bathtub Paint
You Will Need:
1 Tbsp cornstarch
4-6 pumps baby shampoo (about 1/8 cup)
2-3 drops of food coloring
1-2 tsp water

Directions: 
Mix all the ingredients together until you get the consistency you like.

I'm going to cut right to the chase
The Verdict: This stuff is great. The kids love it and have requested it many times.  It's very quick and easy to put together and you really don't have to measure the ingredients.  Just start putting it together until you find a consistency you like. 


Eventually it starts to dry out and the kids can no longer paint with it.  But they get about 30 minutes of painting time before that happens.  When they are done, I grab the shower head and blast the paint with water. It comes right off.  If the paint is really dry then I have to scrub a tiny bit, but mostly it just washes away by itself. 


The first time we did it I was worried about the paint staining the grout.  I took a few dark colors and rubbed them into the grout as hard as I could.  I then left it there the whole time the kids were playing.  The blue left a very light stain on one spot, but it faded within a few days. 

So if you don't have a bungee jump of your own, then this is a great rainy day activity.


Sunday, April 7, 2013

Dry Shampoo or Halloween Makeup?

Personally I have never understood the purpose of dry shampoo.  I figure if my hair looks like it needs a cleaning, then I should clean it...... or put a hat on. Even on those days when I've hit the snooze button to many times and my hair looks like it's been dunked in oil, I will still wash it, give it a quick blow then put it up in a pony tail.

I did try a store bought dry shampoo once, but it didn't seem to do anything.  When I saw a Pin about making your own homemade dry shampoo I decided what the heck, I'll give it a try. There have been a few times were it would have been nice to just slap something in my hair and run out the door.

Homemade Dry Shampoo
Choose one or combine them if you’re feeling frisky:
Cornstarch
Cornmeal
Baking Soda
Ground Oats

For one application, you need only use a tablespoon or two. Take the powdery substance of choice and apply it to your hair roots. Scrub it in with the tips of your fingers, and run your fingers through the length of your hair. With a fine-bristled brush, briskly brush the powder out of your hair

I didn't have any cornmeal, so on two separate occasions I decided to try the cornstarch, baking soda and ground oats.

My hair can go about 2 days without washing it. On the third day it always looks nice and shiny and in desperate need of a shampoo.  So I picked one of those mornings to try out the baking soda and corn starch.

Baking Soda Verdict: My camera didn't go a good job of emphasizing the greasiness of my hair, but if you look closely on the left picture you can see the shine by my ear.  Because I was doing this on one section of my hair, I used 1/2 Tbsp.  I rubbed it into my roots, shook my hair, brushed my hair and was left with hair that looked like I had put baking soda in it.  My roots were several shades lighter then the rest of my hair.  I let it sit for an hour and kept playing with my hair and brushing it but it still looked pretty gross.


Cornstarch Verdict: This one was my favorite.  Not because it worked well, but because it was so bad. After rubbing in 1/2 Tbsp of cornstarch I looked in the mirror and had a good laugh.  My DIY dry shampoo turned into a DIY powdered wig.


After an hour of flipping, shaking, brushing and combing, my hair looked a lot better then it was, but it was still pretty bad looking.  I had streaks of white and a lot of little flakes. 


Ground Oatmeal Verdict:I put the oats into the blender on high until I had a fine powder then rubbed it into my roots.  The only thing the oats did was leave little flakes in my hair that kept showing up for several hours.  My hair was just as greasy as it was before. 


Overall Verdict: Even though these failed miserably, I now have a method to create my own powered wig , give myself a lovely dandruff look and I now know what I will look like with gray hair..... it's not pretty.

Wednesday, April 3, 2013

No Grate Laundry Detergent

A friend of mine once told me that she would like to make her own laundry soap, but she hated the grating part.  It was so time consuming and frustrating for her that it wasn't worth the effort.  When I saw a website about making your own laundry detergent without having to grate a bar of soap I thought, Eureka!  This could be the perfect solution for her.

No Grate Laundry Detergent
You Will Need
3/4 cup Dr. Bronner's Castile Soap (For laundry, I like to use the lavender, almond, and citrus varieties)
1/2 cup Super Washing Soda
1/2 cup 20 Mule Team Borax OR substitute with Baking Soda
 20-50 drops of lavender
2 one-gallon containers in which to store the detergent (I recycled an old laundry detergent container and a vinegar jug)
A measuring cup or two
A two-gallon bucket (I used my old mop bucket)
Funnel to pour the detergent from the bucket into the containers (not necessary but certainly helpful!)
 
Directions:
Take your two dry ingredients first – the Super Washing Soda and Borax or Baking Soda, and pour them into the bottom of the bucket.  Stir well.  Add enough hot tap water to cover the dry ingredients. It’s important to dissolve the dry ingredients BEFORE adding the liquid Castile Soap. Otherwise, it will get super clumpy and your batch will be ruined. Then, either add your liquid Castile Soap OR the water. The soap does suds up pretty well, so if you add it first, slowly add water. Otherwise, add the water first, then at the end, add the soap and stir it in with a long spoon. Fill your bucket up to the two gallon mark with hot water (or add your Castile Soap) Use about 1/3 cup for each load
 
The instructions say that you can either use borax or baking soda.  I chose to go with borax since that is the main ingredient in most homemade laundry detergents.  After mixing everything together I decided that this was going to be a fail.  It looked so watered down that I wasn't sure if my clothes were going to get clean, but only one way to find out.

 
 Using a funnel I poured my solution into an old laundry container and started some laundry that afternoon.
 The Verdict: I used it on the kids clothes first and when I pulled them out of the washing machine I couldn't tell if they were clean or not.  They seemed clean but they also didn't.  They looked clean but they sort of smelled like dirty water.  So I needed a better test subject. 

Instead of washing my rag pile that day, I decided to let them sit and fester until they had a lovely rotting odor to them.  When I finally washed them a few days later I used 1/3 cups.  I pulled my rags out of the wash and they still smelled.... a lot.  So I washed my rags again using 1 1/2 cups of the detergent, they still smelled and some of them still had dirty spots on them. The only thing this detergent is good for is to waste your time and money. 

I'm sort of 2 for 2 with laundry detergents right now.  I hope the next one has a better success rate.