Sunday, June 22, 2014

Cleaning With Just Water

When I started this blog I gave myself one rule "This blog is only going to be my experience with DIY's" which meant I wasn't going to promote anything and I wasn't going to talk about anything controversial such as politics, religion etc.

Today I'm going to have to break my own rule because I'm just so excited about my recent discovery of the greatest way to clean my house. 

Have you ever come across something that impacts your life in such a positive way that you can't wait to tell everyone about it?

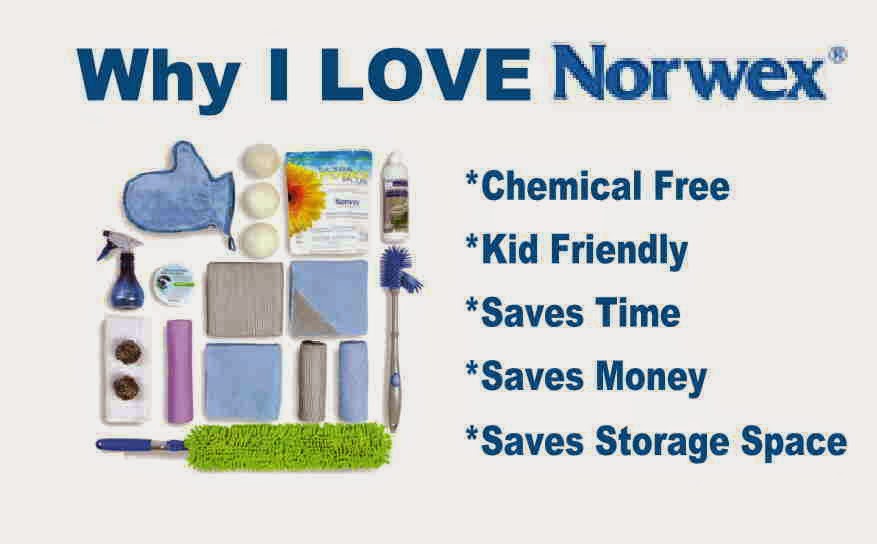
That is how I feel with Norwex.  Their microfiber cloths are AMAZING.  Not only do they require less scrubbing, but because the microfiber has silver woven into them, they inhibit bacteria from growing.  Basically the cloths purify themselves.  How cool is that?!?!

Want proof?  Check this out


I'm so in love with these that I decided to be a consultant and sell them.  But here is my favorite part. I am only going to do facebook parties.  I get to share my excitement and introduce people to chemical free cleaning without going to someones home where people feel pressure to buy.

So if anyone is interested in hosting an online party then feel free to contact me.  You can leave a comment here or email me at thediyguineapig@gmail.com

Here are 5 reasons you should host a facebook party:
1)Earn free products. On average, a host/hostess gets $250 worth of free products.
2) No in-home party means no after party clean up.
3)Your guest list isn't limited by geographic location.
4)All the host/hostess has to do to prepare is invite friends (after I create the event), then send out some private messages.
5)Parties are only 30 min.

With one of the Norwex enviro cloths you can clean your entire house.  Bathrooms, walls, stainless steel, windows, cupboards, etc.


Guilt Free Chocolate

When it comes to chocolate, I'm a bit of a cliche.  I LOVE chocolate and have very little self control when I'm around it. 

I will admit it,  I have been known to sneak away and eat chocolate behind a locked door so I don't have to share with the kids. 

Although, it's hard to enjoy eating it when this happens the second I lock a door
That leads us to today's post.  I can't remember where I first got this recipe, I want to say one of my sisters sent it to me but I'm not sure.

My recipe card calls it DIY Reese's Peanut Butter Cups, but I like to call it Guilt Free Chocolate

Guilt Free Chocolate:
You Will Need:
 1/2 cup coconut oil
1/2 cup  cocoa powder
1/2 cup  almond butter (smooth or chunky)
1/4 cup honey
1/2 teaspoon vanilla

Melt coconut oil.  Mix all ingredients together.  Pour into paper-lined muffin tin cups filling 1/4 the way. Makes 12.   Place in fridge or freezer until hard, about 20 min.   Store in a sealed container in the refrigerator.  


 Only 5 ingredients, and it takes about 5 minutes to make. 

 If you really want to get crazy, add some peanut butter


The Verdict: It depends on your taste buds.  My son hates them, my daughter is indifferent towards them, my husband can eat about half of one then the cocoa powder becomes to bitter for him.  As for me, I have been known to eat all 12 in 24 hours.  

Last week my husband went to the fridge knowing that I had made some that morning.  When he saw that only 2 were left he made a snide remark about me not sharing. Diet starts Monday! 


Monday, June 16, 2014

Cure Mastitis Without Antibiotics

I know what your thinking. "What does mastitis have to do with DIY projects?"  I'll tell you...

Absolutely nothing!

But this DIY cure for mastitis is to good to keep to myself.  So let me share..... without pictures of course.

I woke up one morning with a clogged duct. I had heard that the best way to get rid of a clogged duct is to massage it, put warm packs on it and nurse/pump a lot.

So that is just what I did.  But I didn't really have any idea how often to do those things or if there was a specific way.  So I just winged it.

As the day went on it got worse.  So I pulled out some essential oils and started to massage them onto the clogged duct every hour.

By the next morning I had a huge, red, hot, very sore clogged duct and I had a temp of 101. I was achy all over and just wanted to stay in bed all day.  It was full blown mastitis.

Now I know what your thinking, why didn't I just go to the Dr. at that point?  Because all I could think about was the journey it would take to get there.  It would have gone like this;

Me: Kids, I need to go to the Dr.  Go potty and get your shoes on
daughter: I don't WANT to go to the Dr. I just want to stay here and play
Me: I know you do, but I need to go, I'm sick. Please do what I ask
daughter: grumble, grumble, whine. I can't find my shoes
me: why aren't they in the mud room
daughter: I didn't want them there
*spend 10 min looking for shoes, find them and do a happy dance*
me: your shoes are on backwards
daughter: I just WANT them that way
son yelling from the car: are we leaving yet
me: soon, did you potty
son: oh yeah, I forgot to do that
*10 min later after everyone has gone to the potty and the baby has a fresh diaper*
*buckle the two girls in their car seats*
*drive for 20 min to the Dr while listening to Frozen...... again*
son from back seat: mumble mumble
me: what?  Talk louder
son: WHERE. DOES. THAT. ROAD. GO
me: what road
son: back there
me: can you be more specific
son: the one by the gate
me: I didn't see it
son: where does it go
me: I don't know
son: why not
me: because I've never been down that road
son: why not
me: I just haven't *time to change the subject* lets sing along "Let it Goooooooo"
*get to the Dr. office, unload three kids, carry the infant car seat in one arm and hold hands in the other arm while we cross the parking lot and go up the elevator.*
*wait for at least an hour in the waiting room while the two older kids do everything they aren't suppose to while I continue to say, don't, stop, no you can't, leave that alone, etc.*

Are you tired just reading it?  Just the thought of hauling the three kids to the Dr. office was enough to make me ache even more.

I was determined to fix it on my own so I wouldn't have to go.

That afternoon I texted my sisters and my sis-in-law.  Between the four of them there are 18 kids.  I figured at least one of them could give me advice.

Sure enough, my sis-in-law sent me a text with very detailed instructions:
"Get in the shower and put the shower head on the hurt spot as hot as you can stand it.  Your trying to "melt" the fat that's causing the problem. Massage the sore spot, starting at the closest part of the pain to the nipple and work your way back.  You're massaging and pushing towards the nipple the whole time. It's going to hurt. After about 5 minutes of hot water on the spot, get out and immediately drain the breast using the baby or a pump. Use whatever one has a stronger suction. Empty the breast completely. Drink lots and lots of water.  Do the whole thing again every 2-3 hours"

I did that three times before I went to bed that night.

The Verdict: When I got up the next morning my ache and fever were gone.  I still had a bit of a lump so I took 2 more really hot showers that day.  By the following morning I was tender from all the hard massaging but other then that I was completely fine.

Note: She did say that this doesn't always work, it depends on how long you've had the infection and where it's located.  But being able to fix it at home without a Dr. visit or medication is worth a try, in my opinion.

Monday, June 9, 2014

DIY Fabric Wall Decal

My oldest daughter is obsessed with Tinker Bell.  So much so that Tinker Bell out ranks Elsa from Frozen *gasp*

 A year ago she asked if she could have a Tinker Bell room and being the awesome mom that I am (really I just love any excuse to take on a big project) I said ok.

I couldn't find any affordable Tinker Bell decals so I found a tutorial to make my own.

Fabric Wall Decals
You Will Need:
Heat n Bond Ultra Hold
Cotton Fabric
Iron
Scissors

Directions:
Now that you have your image, let’s get started by ironing your fabric. It needs to be completely wrinkle free. Then, lay the fabric face down and lay down the Heat n Bond on top of it, with the paper side facing up. Iron on top of the paper to adhere it to the fabric - See more at: http://www.madebymarzipan.com/?tutorial=fabric-wall-decals#sthash.OWipEX7M.dpuf
 Iron your fabric, It needs to be completely wrinkle free. Then, lay the fabric face down and lay down the Heat n Bond on top of it, with the paper side facing up. Iron on top of the paper to adhere it to the fabric
Now that you have your image, let’s get started by ironing your fabric. It needs to be completely wrinkle free. Then, lay the fabric face down and lay down the Heat n Bond on top of it, with the paper side facing up. Iron on top of the paper to adhere it to the fabric - See more at: http://www.madebymarzipan.com/?tutorial=fabric-wall-decals#sthash.OWipEX7M.dpuf


Draw your image directly on top of the paper backing. Remember that you are drawing on the BACK of your decal, so your image will be reversed when you cut it out. 


Cut out the decal. Iron once more, being sure that all of the edges are secure. Allow to cool completely, then peel off the paper backing.
  
Iron it directly onto the wall.


To remove the decal, simply peel off. It won’t take off the paint or leave any marks– BUT– you probably won’t be able to reuse the decal once it’s been removed, it loses most of its “stick.”  

I found the Heat n Bond in the sewing aisle at Walmart. It was right next to the sewing machines and was pretty inexpensive.
 I wasn't about to draw Tinker Bell free hand, so I found a silhouette my daughter liked on the computer and I printed it and cut it out.  I was really worried about the wand working because it was so thin, but here's hoping. 
After I ironed the Heat n Bond to a piece of fabric, I put the silhouette on the back of the Heat n Bond and traced it.  Then I cut that out.


This was my final product.  It turned out a lot better then I thought it would. 

I didn't want to leave any marks on the wall with the iron, so I got some scrap fabric and put it over the Tinker Bell to protect the wall. 

I ironed for about 45 seconds on high and Tinker Bell was fully stuck to the wall. 
 9 months later it was time to move again.  I gently wiggled my fingernail under Tinker Bell's foot and she came right off.  It was easier then peeling off a posted note.  


 There was a faint mark left behind, but I could only see it from a certain angle. 


The Verdict: If you actually took the time to read the post and not just skip to the end (I'm guilty of doing that) then you'll have noticed that this worked very well.  The whole project only took me 30 minutes. The only complaint I have was the small mark left behind.  Looking back I wish I had taken the time to try and wash it off, to see if I could.  But I was in moving mode and washing a wall that was going to be repainted was just extra work.

But wait! There's more!

After I got Tinker Bell off the wall, I gently put her into a scrapbook as a loving memento for my daughter..... hahaha yeah right. 

Tinker Bell was wadded up and shoved into a drawer. Apparently this will always be her fate.
 Why did she end up there?  Let me tell you.  When I took her off the wall I couldn't find any trash cans so I shoved her in a drawer thinking "the movers can deal with this." Yep, that's how I roll.  Ok, normally I'm not that lazy, but I was 7 months pregnant and moving to a new state. I was a bit tired.

Anyways..... 3 months later I found Tinker Bell and wanted to see if she would go back on the wall.  

TaaDaa!  She stuck right on good as new. 


 Now I'm off to Never Land, and by that I mean the laundry room with the never ending pile of clothes.